Showing posts with label garden. Show all posts

Wednesday, July 4

garden update: community plot, june 2012

The community plot is doing well, despite several incidences, and is filling out nicely. Summer has not quite arrived in Vancouver; we've had a few days of sun but the past weeks were damp and I haven't had a need to put away my cardigan sweaters.

We've been planting seeds and seedlings since April. We've also been harvesting cool season crops, including chard, perpetual spinach, lettuce, radish, turnips, and arugula. There are no more empty spots and everything is growing to be harvested in the next few weeks.


The tomatoes are starting to flower! We've been vigilant in pruning the tomatoes to try maximize the harvest. We snap off all the suckers so energy is spent on growing and fruiting. We also trim stems at the bottom foot of the plant to make way for the basil planted around each plant, but also to ensure no stems touch the ground and remain wet for too long (it's been very damp).

We're just harvesting the last of the quick growing spring crops, including the turnips which our rabbit, Beans, love so much. The turnips germinate easily and grow quickly, so it'll always find a home in this garden.

The purple and yellow onions we bought as seedlings from Tim Chiang's Garden are all doing well in their neat rows. We had several wind storms in spring so their leaves are all bent and whacky looking. They also have a "gangster lean" to the south since the northwest, north, and northeast are shadey. I was initially worried that we won't have a means to distinguish which are purple and and which are yellow onions, but the purple tinge on their stems are very telling!

By far, the star of this garden are the nasturtiums. I planted several varieties, but put off labelling them...then I had forgotten which is which. I love all nasturtiums equally so it's not much of a bother. Some are easily identifiable, but I cannot distinguish between "Peach Melba" and "Vanilla Berry". My plan is simply to collect the seeds and have a grab bag of nasturtiums.

The Green Arrow peas are almost ready for picking! We staggered planting this row to ensure a steady harvest. Each week we filled egg cartons with seed starting soil and seeds (three cartons per week with 6 slots each). Once all seedlings are at least 8cm (3") tall, the entire cartons are buried to soil level. This ensures the seeds are still perfectly spaced and there is less transplant shock. It's being held up (barely) by bamboo sticks fashioned into some semblance of a trellis.


Above is the photo of the transplated Red Noodle Beans. They were originally planted in the back of the plot where their tall trellis will not shade any other plant. Unfortunately, they weren't doing very well and were days away from completely withered. Meanwhile, there was a spot where the lima beans were planted but had very poor germination. (Note to self: Nature cares not how much you love them, it's too cold for lima beans!) The Red Noodle bean seedlings were moved, and just in case they don't make it I've direct-seeded more seeds beside each plant. They went in the ground really late so I'm expecting the worst, but am hoping for the best case scenario!

The sun should be coming out in July so I'm hoping for a sudden growth spurt and a basket full of harvest.


Tuesday, June 26

make: strawberry planter

There are many existing strawberry planter options out there, both to buy and to make. A quick search on Pinterest will yield a find PVC, pyramid, tiered pots, and on ground options. However, they are likely to be at least two of the following:
  • Cost more than $10
  • Too heavy to hang onto a lattice fence
  • Not cute
  • Not patio friendly, i.e. needs to sit on soil
  • Has bad irrigation or difficult to water
  • Need to be constructed and require a trip to the hardware store
I don't believe you should spend large quantities of money to enjoy gardening nor make a weekend project just for a few cups of strawberries from the patio. So here's what I put together:


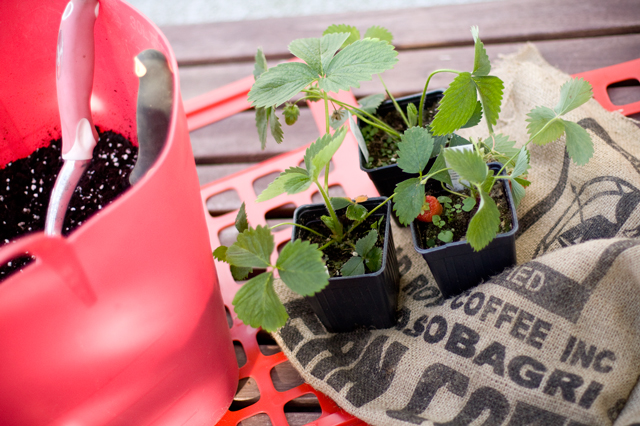
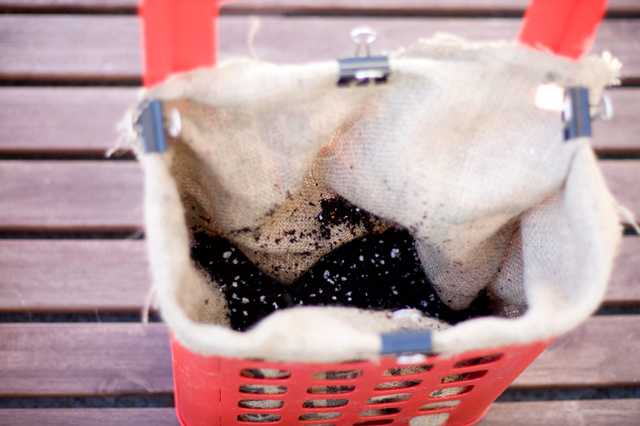
This planter consists of a trash basket from IKEA for ($5.99 CDN), burlap bag, and some binder clips (optional). In other words, it required minimal effort and it cost less than $10. Also, it's pretty freaking cute, isn't it?

This can be adapted to similar items like a small laundry hamper or IKEA's plastic bag dispenser. This DIY project doesn't even need a step-by-step tutorial because it's simple, but here it is anyway:


Sew or find a reusable cloth bag that would fit inside your container. I used burlap because it's what I had lying around, but anything porous or even leftover landscape fabric will do. Drill some holes at the bottom of your container. Put your fabric bag inside, keep in place using binder clips or clothes pins. Fill the bottom with soil*.


At this point, determine in which holes your strawberry plants will occupy. Cut a slit through the fabric at your selected areas. Fill with soil until you reach the first slit. Insert the strawberry roots, hold in place, and continue to fill with soil. Pat down the soil to ensure stability. Do same with the remaining spots for strawberries. Hang it up, water thoroughly, and wait for strawberries.


*Because I'm hanging this planter, I added perlite to the soil to keep it light. Alternately, you can use packing foam peanuts or whatever you use to improve irrigation and weight.


Sunday, June 17

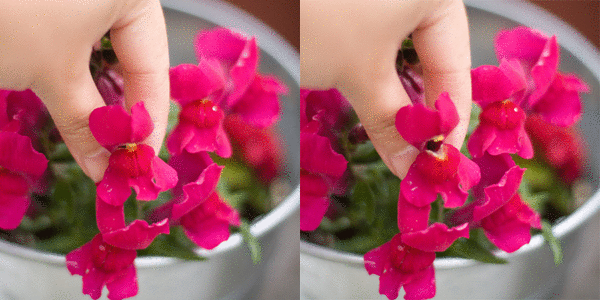
bloom: snapdragon flowers roar

Snapdragon flower. 

Some flowers are meh, some flowers are beautiful, and then there's the Snapdragon flower. It comes in a multitude of colours, available in dwarf to tall varieties, but most fun of all...it's interactive! You can make it roar! Here's a .gif I made to illustrate my point:
Snapdragon roars!

Wednesday, June 13

blargh: sometimes people just suck

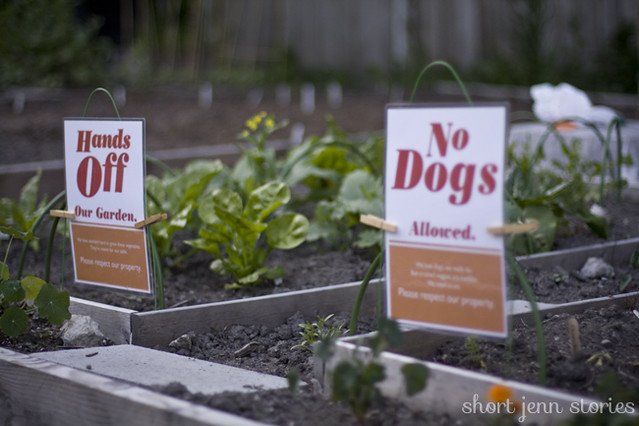
Signs we made and posted after several incidents.
I was on a waitlist for almost one year before getting the call that a new community garden will be set-up near my home. It's a plot that Bryce and I built from scratch. The community garden build was during an unusually warm September. On three afternoons during a heatwave, we built the frames, loaded the wheelbarrow with soil using a shovel, and hauled soil back and forth. One heavy load of dirt at a time.

This is the first year that I grew everything from seed. I invested in a pantry rack, heating mats, seed starting soil, grow lights, and everything else needed. I bought seeds from reputable sources and bought only open-pollinated, GMO free seeds. I was excited about everything. Every new growth and every change in that growth was documented and stared upon in awe for a few minutes too long. I created and stuck to a strict schedule to ensure I do not forget anything. I had a spreadsheet!

I fully understand that gardening has just as much disappointment as moments of joy, pride, and accomplishments. I've prepared myself for the disappointment when a seed doesn't grow or when a seedling doesn't transplant well. I know some plants may not bear as much fruit as I anticipate. I know critters may dig up or eat my plants. But I completely forgot to take into account that sometimes people just suck.

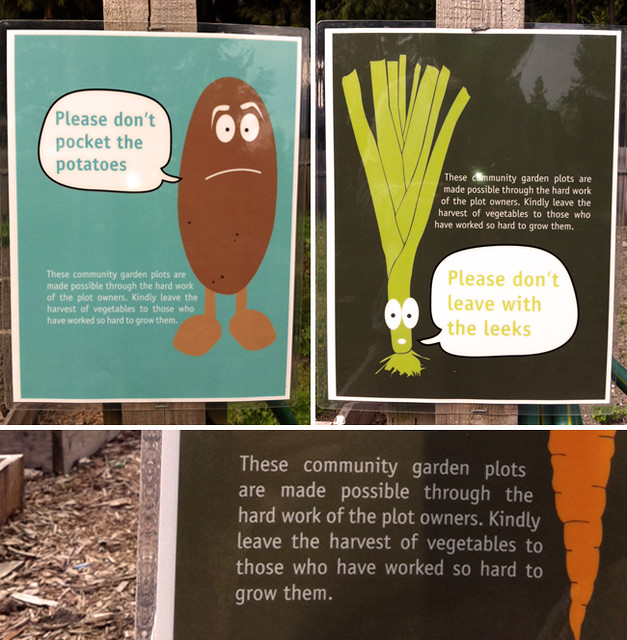
Our community garden is tucked away in a small park at a residential neighbourhood. There isn't much traffic and only those who live in the area would even know of its existence. There is a large sign posted at the entrance, as well as smaller laminated signs, proclaiming that all plants are owned and are grown by their respective plot owners. And yet every few weeks when I speak to plot mates, I find that they too have had some leaves cut haphazardly, fruits picked, plant support, or misc. items in their garden stolen. It's heartbreaking.

Signage posted throughout the garden.

As for my plot, I've had garlic shoots cut, root veggies pulled, my row cover box (a mesh drawer I hand-stitched a row cover over to use for newly transplanted seedlings and for salads) stolen, and most recently had four plants dug up. We've also had plants trampled and destroyed by dogs--evident by large paw prints left behind. It makes me upset every time.

I'm trying to set aside some money so I can build fencing around my plot. If you have any great DIY ideas (read: cheap) for a fence, or if you have dealt with garden thieves, let me know!

Thursday, June 7

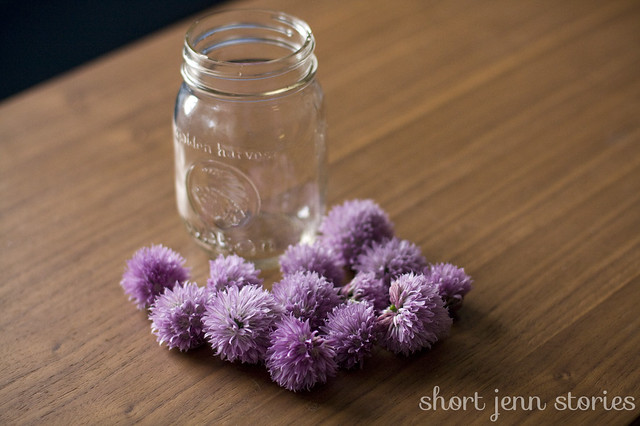
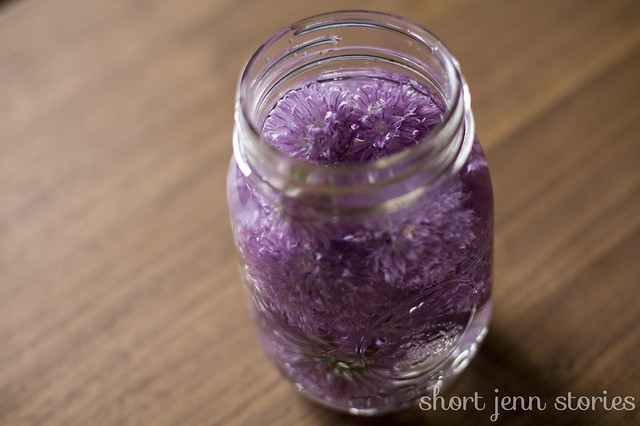
make: chive infused vinegar


File this under things that sound fancy and looks beautiful but is really simple to make. It doesn't even require a recipe!

Collect chive blossoms and wash them to get rid of any dust or critters inside. Place it in a mason jar with whatever vinegar you have on hand, then wait for two weeks before straining it. Some advise putting it in the dark or in the sun, or using something fancy like champagne or white wine vinegar. I just left mine sitting on the kitchen counter and used white vinegar I had on hand.

It'll turn into a beautiful pink vinegar with a light chive smell and taste! Use it for salad dressing, dips, and sauces.

Monday, June 4

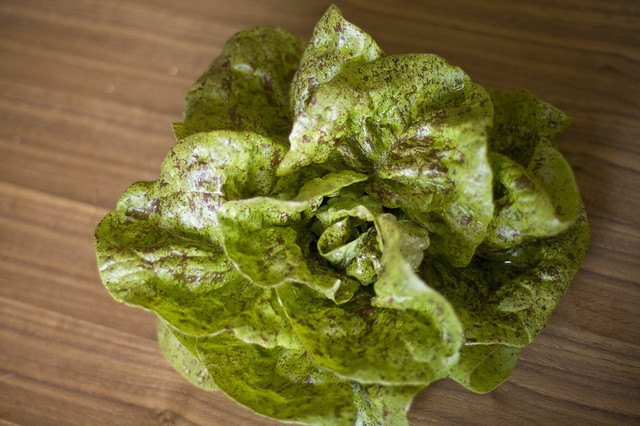
harvest: butterhead lettuce 'speckles'

'Speckles' Lettuce
Speckles is an heirloom bibb lettuce that originated from Germany and Holland. It was brought over 200 years ago to North America. It's a great tasting lettuce perfect for salads and sandwiches.

I grow it on a raised bed in the community garden and in containers in my patio. Matures in about 55 days and does well in cool, damp weather. Sow in batches of 3 every other week from mid-March to June and again from mid-August and through September to stagger harvests.

It transplants well, but make sure to transplant on an overcast or cloudy day! (I transplanted a batch on a sunny day and it withered by the next day. Oops!) Transplant 10cm (4") apart. Once the leaves touch, thin by harvesting every other plant and let remainders grow until you want to eat them!

Tuesday, May 22

garden update: patio, may 2012


Chives in bloom. Find the bug!


It must be Super-Fun-Turbo-Awesome-Plant-All-The-Things Time because Bryce and I are now a familiar sight at the local garden shop, Tim Chiang's Garden. They're a local small business with a no frills approach to their merchandising. This means two things:

  1. Prices are much cheaper than big box stores (Home Depot, Rona, Canadian Tire, etc.) and cute garden shops that cater to hobby gardeners with big houses I will never be able to afford (Art Knapp, GardenWorks, Prickly Pear, David Hunter, etc.).
  2. There are many, many varieties sold but all seeds are locally derived from their own gardens or from local seed sellers.

Both are great news because I'm cheap and given the choice, I will always choose the local small business with local products.

We're at Tim Chiang's at least every other week to buy soil, pots for the patio, and whatever annual flower that I happen to gravitate towards. That said, none of the photos on this post include plants from Tim Chiang's...that's for another post, maybe.

May means our weekly salad harvest will soon begin! Last fall we constructed four 7'x 4' (2.1m x 1.2m) rectangular borders for the community garden so we can practice crop rotation. I used the left-over pieces to create a small salad box. Behold, my DIY prowess:
DIY Salad Box! Contains mescluns 'Mild Blend' and 'Valentine'.

The tomatoes were transplanted the first week of May, both in the patio and the community garden. They're all doing well with the exception of the Toma Verdes in the community garden who may be whispering to themselves, "I think I can, I think I can, I think I can..." I believe both will make it though. In the meantime, we've had two straight weeks of sunshine in May so some plants growing like gangbusters!

The tomato 'Gold Nugget' seems to be growing in height at least an inch a day. It's already started flowering and it may just bear the first fruits of the season. It's accompanied with 'Genovese' and 'Purple' basil.
Tomato 'Gold Nugget', Basil 'Genovese' and 'Purple'

Meanwhile, the 'Hahms Gelbe' isn't getting taller but it's getting leafier and stockier! Like me! I bought the seeds from You Grow Girl so I like to think the seeds were saved from the plant on this post. This was sown on March 26, want to see the photo evidence?
Tomato 'Hahms Gelbe' and Basil 'Sweet'

For the first time, I was crazy enough (and Bryce was even crazier for agreeing to come with me) to attend the VanDusen Plant Sale. If you don't know about the sale and you're not a gardener, I'll have to put it in terms you would understand:

  1. If you love fashion, it's a 7 hour pop-up shop with limited-edition current season designer clothes, bags, and shoes on sale at 70% off. Oh and your favourite blogger got a sneak peek and there are only two of the purses you want!
  2. If you're a nerd, it's a 7 hour sale for the signed, original series, screen-used costume from the show-with-a-remake you love. Oh and it's the one your favourite character wore for the season finale with a twist that changed the entire story!

Anyway, back to the plant sale. It's a yearly fundraiser for VanDusen Botanical Garden. It's a one day event from 10:00 AM to 4:00 PM. There are about 3,000 plants for sale and draws about 12,000 visitors. The list of plants for sale are published a few weeks ahead. Master gardeners are present throughout the different stations to answer any questions. The main draw for avid gardeners is that many plants come from local master gardeners' personal collections--plants that are often not available in stores! This year, the first person to line up was there at 5:45 AM.

I consulted the master gardeners for advice on which plants would be happy in a container on a north facing patio. They recommended that I begin with hostas and geraniums. That said, I could not help myself and bought some lilies. What? Yeah I know, lilies require full sun...but I still get a solid strip of full sun at the very end of the patio which they can happily share with the tomatoes. Here's my first hosta!
My first Hosta, 'Bressingham Blue'

A gardening post is never complete until there is an obligatory photo of the garden supervisor. Monty has made a habit of perching on this nest of leaves while I garden. I moved his catmint plant right next to it for convenience, which he habitually bats half-heartedly. Also, because he loves boxes I've placed a box next to this set-up just in case the leaves are wet and he can't perch on it. Don't even act like you wouldn't do the same!
Monty on his leaf nest, eyeing his catmint.


How is your garden coming along?


Thursday, April 19

grow: tomato seedling, amish paste 2012

My dad always manage to grow the most ridiculously successful and bountiful tomato plants, despite lack of pruning, fertilizing, and general maintenance. It's so ridiculous that though he leaves his tomato plants uncovered until early October, and while gets soaked from several days of rain, his tomatoes never get blight. His neighbours' plants get blight, but his does not. We don't know how this happens, because from everything I've read and been taught his tomatoes should get blight. I don't question his methods, I just try to imitate them now.

His favourite cultivar is Amish Paste. He loves the plant but hates starting them, so I've been assigned to that task. This year, I started all my seedlings in diy newspaper pots:
It's alive!

On DIY Newspaper Pots

There are plenty of tutorials online on how to make these if you're interested. I started all my warm weather seedlings in newspaper pots–tomatoes, peppers, eggplants, and basil. I don't think I'll use them again. Yes, they are cheap (free supply at the building lobby) and are easy to make, but they wick the water away from the growing medium. I tried to remedy this by keeping the plastic dome on my seedlings and simply propping it open for air circulation. The soil remained moist, but it was too moist for too long. After a few days ugly white fuzz appeared! It's fuzzy and just slowly covered the top of the soil. A Google search and several gardening forums confirmed that while unsettling to look at, it is harmless and is caused by the lack of airflow in constantly moist environment for seedlings.

Tomato Roots and Their Super Powers

Deeper and more extensive root system mean sturdier plants that can easily extract water and nutrients from a larger area. In other words, tomatoes do better if they have deep roots.  Luckily they have a wonderful ability (super power, really) to grow roots along their stem (given the right conditions). This means that when it is transplanted to a bigger pot or to the garden, it should always be buried to its neck.

Repotting a tomato seedling. Bury the main stem to get a more extensive root system.

Two weeks after:

See the fuzz along the stems? All potential roots!

This plant has since been transplanted into a larger pot. (I broke off the two lower stems and buried it to its neck again.) It is now hardening off in the patio greenhouse. But more on that later.

Do you start your plants from seed? Or you you buy seedlings instead?


Related Posts Plugin for WordPress, Blogger...